White clamp marks or real slipping? Check three holding points before raising tension
Locate what moved, clean the correct surface, and check calibration with the intended instrument. A mark, a slipping string and a moving base call for different observations.

White marks can appear on some multifilament strings during clamping: Wilson explicitly includes that case in its Baiardo L troubleshooting table. The same entry tells the operator to clean the clamp and use the lightest pressure that still holds the string. That combination matters. Colour change is one observation; string movement through a closed jaw is another. Start by describing which one actually happened.
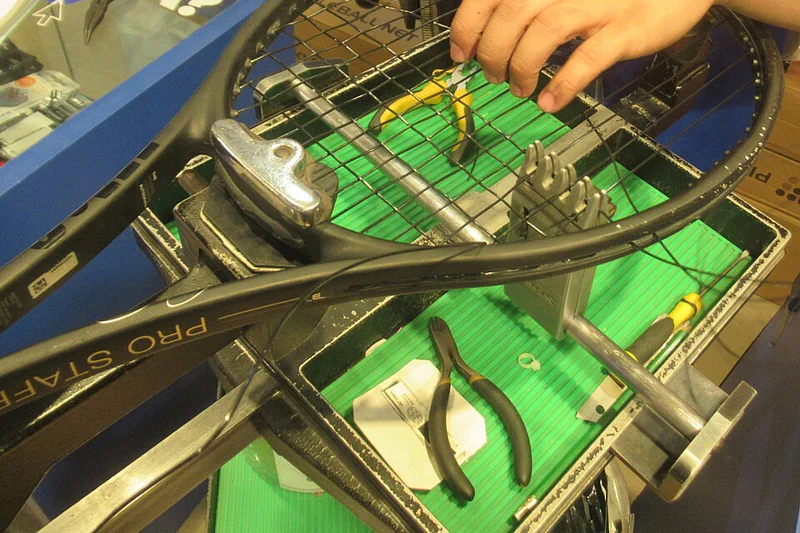
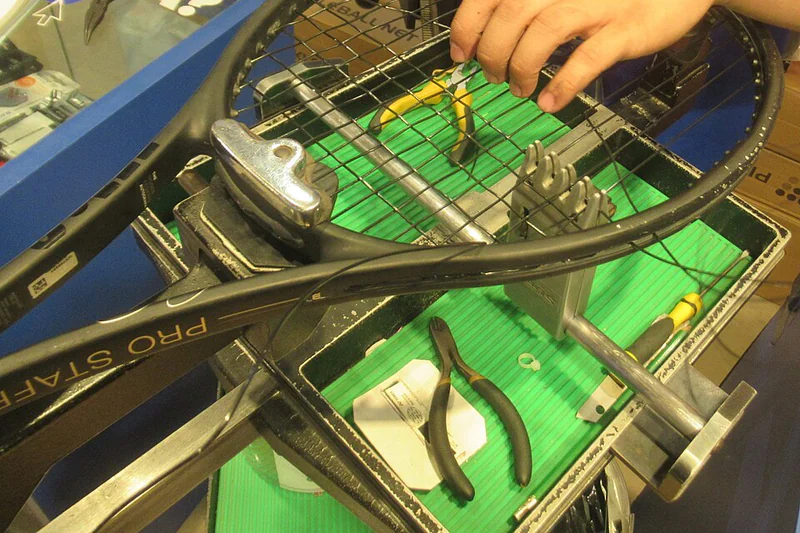
A stringing machine has several places where a job can lose its intended hold. The string clamp grips the strand near the racquet. Its base locks the assembly to the turntable or rail. The puller grips the free string while applying load. Following this short chain gives a practical inspection order and keeps three different adjustments from becoming one vague request to tighten everything.
Locate the movement first
Watch the reference points during ordinary operation from a safe position: the strand relative to the jaws, the base relative to the rail, and the strand relative to the puller. Note when the movement occurs, such as while pulling or after releasing the tensioner. These observations identify a component for inspection. A completed racquet reading is useful in a service history, but the mechanical event gives the technician a place to begin.
| Observation | First area to inspect | Useful note |
|---|---|---|
| Strand moves through closed jaws | String clamp contact and adjustment | Gauge, residue and timing |
| Whole base moves along its track | Base lock and rail contact | Direction and moment of movement |
| Free string slips in the puller | Puller contact and grip adjustment | String diameter and pull phase |
| Pale mark on a multifilament | Contact mark plus holding behaviour | Construction, location and any movement |
Consider a change from one string diameter to another on the same machine. Wilson instructs Baiardo L users to adjust clamping for different diameters, including the puller grip. Record the new model and gauge before the first pull, then establish a secure hold using the model’s procedure. Carrying over a previous knob position hides the adjustment that the change in string may require.

Clean the contact surface before adding pressure
GAMMA explains that string residue can build up on gripping surfaces and reduce friction. Increasing pressure while leaving that layer in place changes the squeeze without removing the cause of the poorer grip. Cleaning addresses the contact surface itself. The useful sequence is therefore to inspect the surface, perform the prescribed cleaning, let the parts dry, and then reassess the adjustment with the string being used.
For the Baiardo L, Wilson’s safety instructions require switching the machine off and unplugging it before cleaning or servicing. Its maintenance section describes rubbing alcohol on an old toothbrush or shoelace for the clamp teeth and puller interior, followed by drying. Glide rails use a soft alcohol-dampened cloth; the display uses a clean, dry cloth. Each surface receives its own method rather than a general spray over the machine.
After cleaning, the target is a reliable hold with the least effective clamping pressure. Wilson places this advice beside its explanation of white marks on some multifilaments. Record the string construction, gauge, mark location and any observed slipping together. That gives a service technician more information than a close-up of the pale patch alone, and helps compare what changed after the adjustment.
The base and puller have their own adjustments
If the clamp base itself slides along the rail while the strand stays held in the jaws, inspect the base lock and rail contact. GAMMA treats sliding or releasing bases as a separate question from slipping strings. Its guidance covers the base adjustment and cleaning the turntable contact surface. Tightening the jaws targets the strand; correcting the base targets the attachment to the machine.
The Baiardo L manual illustrates separate clamp and base levers, then limits base-setting changes to small steps of no more than one-eighth turn at a time. This is a model-specific instruction about the base adjustment. Keep the manual open at that section so the operator follows the pictured assembly and screw, with a record of the change made.
The puller is a third contact point. Baiardo L documentation identifies a 2.5 mm adjustment screw for its grip pressure and relates that adjustment to string diameter. Its troubleshooting table separately lists a string slipping through the puller. A clean, secure racquet-side clamp and a stable base can therefore coexist with a puller problem; observe the free end where force enters the string.
Count work as well as calendar days
Wilson’s Baiardo L maintenance interval for cleaning the clamp teeth and puller interior is every 1,000 pulls. The manual also says that its approximate racquet counter treats 38 pulls as one racquet. Dividing 1,000 by 38 gives about 26.3 of those counter units. The calculation explains the counter’s scale; an operator can log the actual pull workload and cleaning date together.
Wilson’s support page also provides a video labelled monthly clamp and glide-rail cleaning, plus a daily glide-bar cleaning item. Those resource names and the manual’s pull count describe different ways of organizing maintenance. A busy shop and an occasional home stringer accumulate work at different rates. Logging both the date and usage makes it easier to see which interval has been reached.
| Topic | Printed page | What the instruction concerns |
|---|---|---|
| Clamp/base controls | 7 | Separate grip and base adjustment |
| Puller adjustment | 8 | Grip pressure for string diameter |
| Cleaning interval | 16 | 1,000 pulls for teeth and puller interior |
| Slipping and white marks | 19–20 | Component-specific troubleshooting |
Check the tensioning system after grip is stable
Once the gripping path is stable, check whether the tensioning system is correctly referenced. GAMMA calls for a calibration scale and the procedure for the specific machine. The Baiardo L manual likewise calls for a tension meter in its calibration menu. The instrument is used while the machine applies force, which gives the operator a direct comparison with the machine’s displayed setting.
Record the unit before comparing numbers. Baiardo L can display kilograms or pounds, and its interface also offers pull speed, prestretch and a one-use knot-tension feature. A useful job record keeps those settings alongside the requested tension. When two jobs feel different, this record reveals which operating condition changed before a new setting is chosen.
A practical maintenance note can be short: machine model, string and gauge, which component moved, last cleaning date or count, and the action taken. Add calibration instrument and unit when that check was performed. Work through one identified cause at a time, then record the resulting observation. Changing pressure, base setting and reference tension together makes the effect of each intervention harder to track.
- Identify the machine model, string model and millimetre gauge.
- Name the moving component and the stage at which it moved.
- Record cleaning date, usage counter and the prescribed method used.
- Record the specific adjustment, then the observed holding behaviour.
- For calibration, record instrument, unit and the model-specific procedure.
- Retain requested tension and operating settings for the next comparable job.
Give the next person a usable record
For a player returning a racquet to a stringer, bring the string package or exact model and gauge, the work date, and a description of when the concern appeared. A photograph can locate a mark; a description of movement during stringing comes from the operator. Combining those records supports a specific conversation about grip, setup and subsequent play instead of an argument over a single number.
The useful endpoint is a repeatable work process: the strand stays held, the base stays fixed, the puller grips correctly and the tensioning system is checked using its intended procedure. Return to the recorded setup once the identified issue has been addressed. Any later change in playing tension can then be a deliberate equipment choice, with the maintenance history preserved beside it.
Sources and further reading
Keep reading
Same 50 lb, different racquet: the trap when you change stringing machines
Lockout and constant pull do not share a universal conversion percentage. Reproduce a preferred setup by recording the process, material and measurement timing.
7 min readFrom first tension to restringing: decisions beyond an app reading
Choose a starting tension, interpret the first drop and decide whether to continue, adjust the next job or replace the strings. Hypothetical app estimates are clearly separated from measurements.
8 min read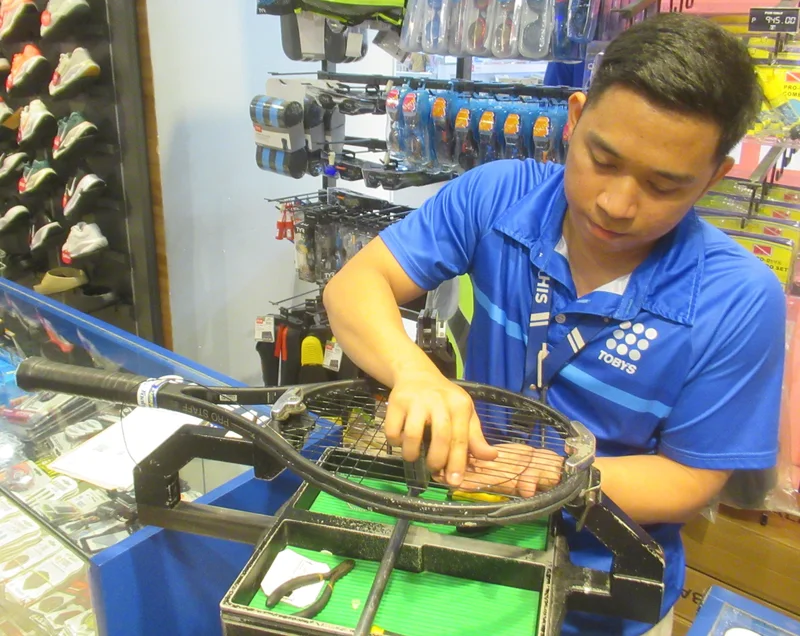
Two knots or four? Read the model’s route before judging the string job
RF 01, Blade 98 and Blade 100 show why one-piece and two-piece stringing need model-specific instructions. Read cross starts, tie-offs and a clear work order.
8 min readTension guide
TENNIS TENSION LAB
Check your racquet’s tension today.
Get a high-precision tension reading in under 10 seconds. Tension Lab tracks changes from your first reading and helps you see when to restring.
- High-precision tension measurement. Ready in under 10 seconds.
- Track every change in feel. See the full story over time.
- Time to restring? Never leave it to guesswork.